Ottoman.
Martha Leone
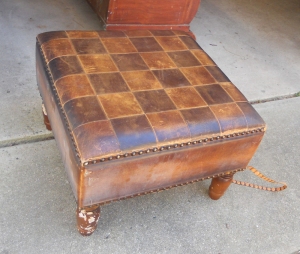
The girls and I were at a thrift store yesterday and found this old thing. We redid it in one afternoon!
How we got there:
Before shot:
Supplies: -old ottoman, the uglier, the better -two coordinating fabrics: one for the top and one for the sides -large upholstery tacks -tacky glue (or fabric glue) -hammer -screw driver -pliers -duct tape -paint for the legs (if your ottoman has exposed legs)
1. First, we took all upholstery nails out using pliers or a screw driver and saved them for use on the finished piece. 2. Then I covered the top with fabric from my fabric stash. Also covered the sides with the same fabric so that it would show through the burlap fabric. 3. Then, we covered the sides with strips of coffee sacks, holding the burlap in place with upholstery tacks.
4. I painted the legs to bring the light creme from the top down to the bottom. 5. I wanted to use the actual stitched sides of the coffee sacks for the ottoman's corners but in doing so, the corners seemed to poke out... they were a bit bulky but I still liked the look. To solve that problem, I used tacky glue and duct tape to calm them down.
After an hour or so of drying, I removed the duct tape and we were ready for pictures outside... just in time for the amazing late afternoon sun!


